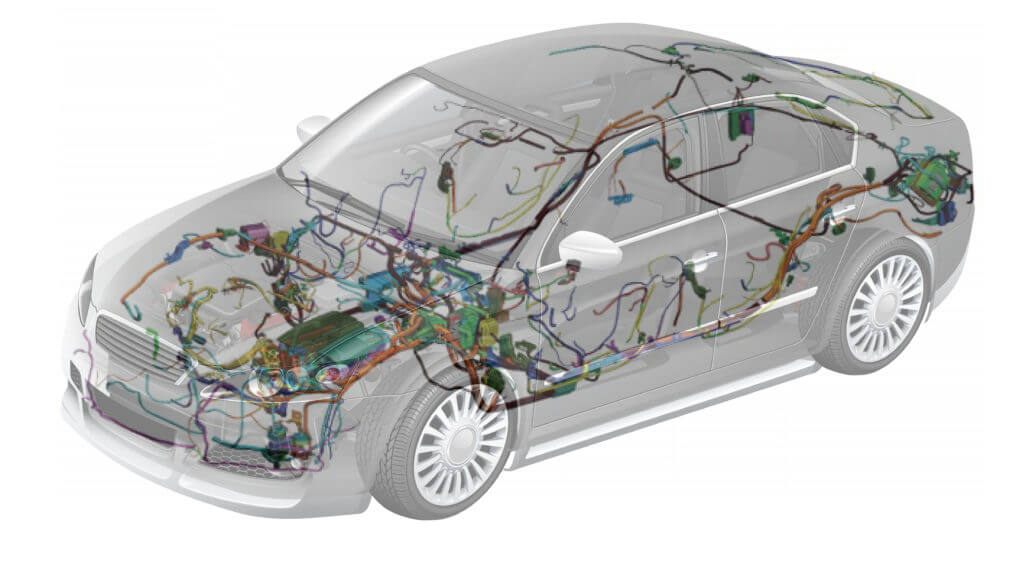
There’s nothing quite as frustrating as encountering electrical issues in your car, especially when it comes to the wiring harness. The thought of costly repairs can be daunting, but fear not! In this comprehensive guide, we will walk you through the step-by-step process of DIY wiring harness repairs. By following these instructions, not only can you save money, but you can also gain valuable skills and regain control over your car’s electrical system. So, let’s dive in and unravel the mysteries of wiring harness repairs together!
Imagine this: you’re preparing for an exciting road trip, eagerly anticipating the adventure ahead, when suddenly, you discover that your car’s wiring harness is causing problems. Panic sets in as you contemplate the financial burden of repair costs. But worry not! I too found myself in a similar situation, determined to find a solution that wouldn’t break the bank. I embarked on a DIY journey to repair my car’s wiring harness and, through research, trial and error, and the support of fellow enthusiasts, I successfully tackled the challenge. Today, I’m excited to share the entire process with you, so you too can take control of your car’s electrical woes.
Here are some common problems that can occur in a wiring harness:
Wire Damage:
Over time, wires within the harness can become worn, frayed, or damaged due to heat, vibrations, or exposure to moisture. This can lead to intermittent or complete loss of electrical connectivity.
Corrosion:
Moisture and environmental factors can cause corrosion on the wire connections, resulting in poor electrical conductivity and potentially leading to malfunctioning components or circuits.
Connector Issues:
Connectors can become loose, corroded, or damaged, leading to intermittent or no electrical connection. This can cause various electrical problems, such as malfunctioning lights or non-responsive sensors.
Wire Shorting:
When exposed wires come into contact with each other or with metal components, a short circuit can occur. This can cause electrical components to malfunction, fuses to blow, or even pose a fire hazard.
Wire Breakage:
Constant flexing and movement of wires within the harness can lead to wire breakage or detachment from connectors. This can cause specific circuits or components to stop functioning properly.
Faulty Grounding:
Inadequate grounding can result in electrical issues, such as dim lights, erratic behavior of electronic components, or even damage to sensitive electronic systems.
By identifying these common problems, you can focus your troubleshooting efforts on the specific areas where the wiring harness is likely to be affected. Remember to perform a thorough inspection and follow the step-by-step guide mentioned below to address these issues effectively.
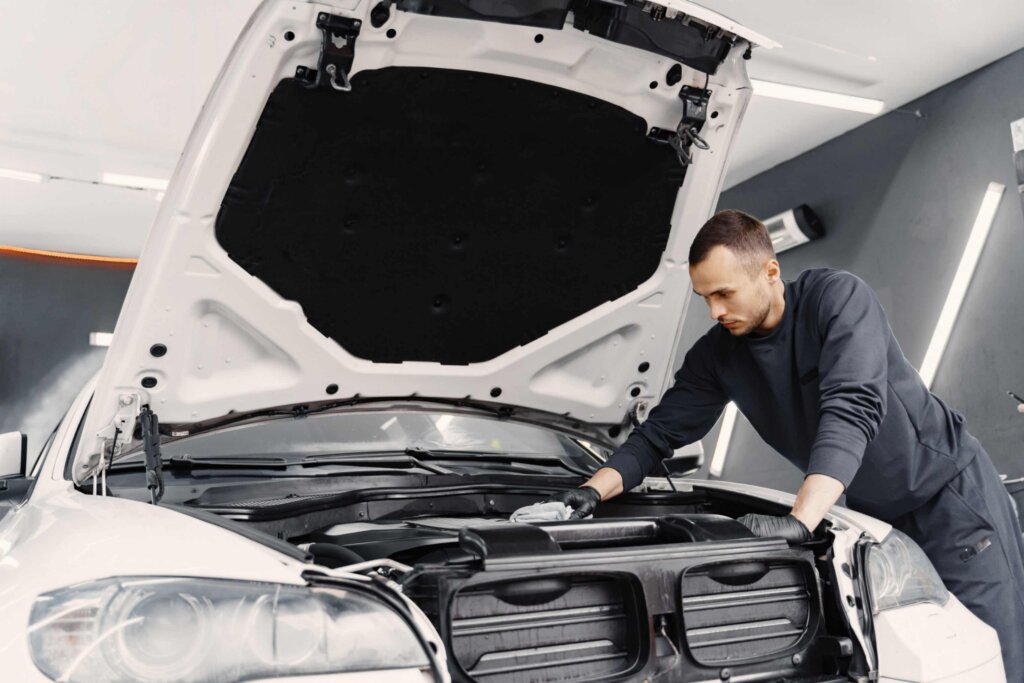
Step 1: Assessing the Problem:
To begin the repair process, it’s crucial to diagnose the issue with your wiring harness. Keep an eye out for signs such as malfunctioning lights, electrical shorts, or burnt wires. Take the time to thoroughly inspect the harness for any visible damage or loose connections. This initial assessment will help you understand the scope of the repair and determine the parts you may need.
Step 2: Gathering the Tools and Parts:
Once you’ve identified the problem, it’s time to gather the necessary tools and parts for the repair. Some common tools include wire strippers, electrical tape, soldering iron, heat shrink tubing, and a multimeter for testing. For high-quality wiring harness components, OEMUsedCarPart.com is your trusted source, ensuring you have the right parts for the job.
Step 3: Disconnecting and Removing the Harness:
Begin by disconnecting the battery to ensure your safety during the repair process. Carefully remove any panels or coverings that provide access to the wiring harness. Take note of the connectors, clips, or fasteners that secure the harness in place. It’s helpful to document the harness’s original routing and connections to simplify reinstallation later.
Step 4: Identifying and Repairing the Faulty Wires:
Inspect the wiring harness for damaged or frayed wires. Identify the problematic sections and carefully remove the damaged portions. Use wire strippers to expose a small length of undamaged wire at both ends. In cases of extensive damage, it may be necessary to replace the entire section with a new wire from OEMUsedCarPart.com. Connect the new wire using soldering techniques and protect the joint with heat-shrink tubing.
Step 5: Reinstalling and Testing:
With the repairs complete, it’s time to reinstall the wiring harness. Follow the original routing and secure the harness using connectors, clips, or fasteners. Double-check all connections and ensure everything is properly secured. Reconnect the battery and test the repaired circuit using a multimeter or by turning on the corresponding electrical components. Verify that the issues have been resolved and that your car’s electrical system is functioning correctly.
Conclusion:
Congratulations on successfully completing your DIY wiring harness repairs! By following this comprehensive step-by-step guide, you’ve not only saved money but also gained invaluable knowledge and skills. Remember, OEMUsedCarPart.com is your reliable partner for sourcing high-quality wiring harness components and other OEM parts. Visit our website today to explore our wide selection of parts and support your DIY endeavors.
Now armed with the confidence and expertise to tackle wiring harness repairs, you can take control of your car’s electrical system. No longer will you need to solely rely on expensive repair shops. Embrace the DIY spirit, save money, and gain a sense of accomplishment as you restore your car’s electrical functionality. Happy repairing!